How to Print Your Logo on Paper Cups: From Artwork to Mock-Up
October 06, 2026
Printed paper cups turn every drink into a moving advertisement for your brand - and they are one of the lowest-cost branding tools a cafe or food business can buy. If you have never ordered custom printed cups before, the process is simpler than most buyers expect: prepare artwork, confirm a mock-up, approve a sample, receive production. Here is exactly how it works at GreenZone Pack.
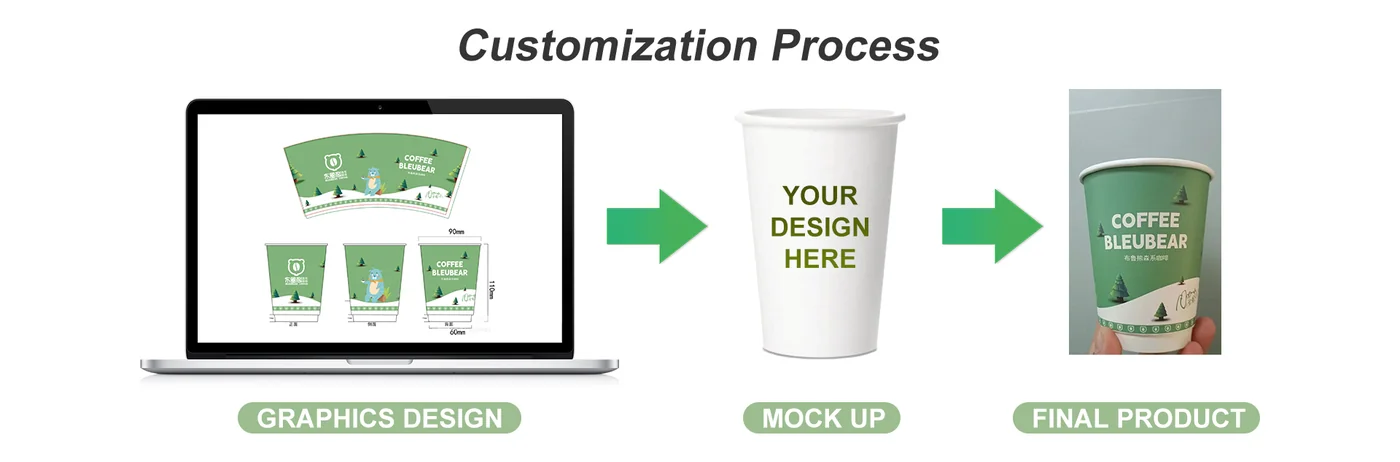
Step 1: Prepare Your Artwork
Paper cups are printed on a flat sheet before the cup is formed, so your design is supplied as a die-cut template - a flat, cup-shaped layout. We provide this template for free once we know your cup size and wall type. A few rules that keep your design crisp:
- Send vector files (AI, PDF or EPS) whenever possible; 300 dpi images also work for photos.
- Reference Pantone (PMS) codes for brand colors - screens rarely match print exactly.
- Keep text and key logos at least 10-15 mm away from the rim. Many markets prefer no ink in the lip area, and fine elements close to the edge can distort when the cup is formed.
- Avoid very fine gradients and hairlines - they can band on flexo printing.
Step 2: Choose Your Printing Method
Two methods cover almost all custom cup orders:
| Offset printing | Flexo printing | |
|---|---|---|
| Best for | Full-color designs, photos, fine details | 1-4 color logos and text |
| Color matching | CMYK + Pantone | Pantone spot colors |
| Unit cost | Lower at large volumes with complex art | Very economical for simple logos |
| Ink | Food-grade inks on both processes | |
Not sure which fits your design? Send the file - we will recommend the process that hits your quality target at the lower cost.
Step 3: Mock-Up and Pre-Production Sample
Before anything is printed, you receive a digital mock-up showing your artwork wrapped on the actual cup size. For new designs we can also arrange a pre-production sample so you can check the print quality, color and size in your own hand before mass production.
Step 4: Mass Production and Quality Checking
After you approve the sample, production typically takes 15-25 days depending on quantity and print complexity. Every batch is checked for print registration, color accuracy, sealing and leakage before packing. Cups are produced in FDA- and ISO-certified facilities by our manufacturing partners.
Common Mistakes to Avoid
| Mistake | What happens | How to avoid it |
|---|---|---|
| Designing on a cylinder instead of the die-cut template | Logo looks stretched or tilted on the finished cup | Always design on the template we provide |
| Matching colors on screen | Printed color looks different from your brand color | Give us Pantone codes and confirm on the mock-up/sample |
| Text too close to the rim or seam | Distorted or covered by the lid | Keep a clear zone at rim and seam |
| Ordering lids separately without checking rim size | Lids do not fit | Confirm rim diameter (e.g. 80 mm vs 90 mm) with us |
FAQ
Can you match my exact brand color?
Yes - print with a Pantone (PMS) reference and we confirm the color on your mock-up and sample before production.
I only have a JPEG of my logo. Can you still print it?
Usually yes. Send what you have; our design team redraws simple logos into print-ready vectors as part of the service.
What is the MOQ for printed cups?
MOQ starts from 5,000 pcs per design, depending on cup size, wall type and print method.
Start Your Custom Paper Cups
Tell us your cup size, quantity and logo file, and we will reply with a quotation and free die-cut template within 24 hours. Contact Anna Cai, Export Manager: [email protected]. See our full range on the custom printed paper cups product page.